

As an Amazon Associate, I earn from qualifying purchases.
In this article, we will take you through the process of a bungalow hip to gable loft conversion in Basildon, Essex, UK. With the help of real architect drawings and images showcasing the progress of the job, we will provide a detailed step-by-step account of how we successfully transformed the bungalow into a stunning house.

The Customers Existing Bungalow
Below are drawings of the customers original property, located in Basildon, Essex, UK. It was a 3-bedroom detached bungalow, with a garage. The height of the roof from inside the loft was approximately 3m, meaning great potential for loft conversion space.

Fig 1. Existing Bungalow, from the outside
(Image taken from Architect Drawings)
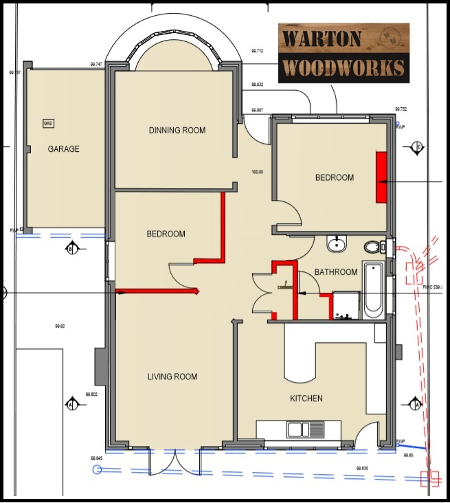
Fig 2. Existing Bungalow Design, from the inside
(Image taken from Architect Drawings)

Fig 3. Bungalow front. Before conversion

Fig 4. Bungalow rear. Before conversion

Fig 5. Bungalow rear. Before conversion

Fig 6. Bungalow side. Before conversion

Fig 7. Bungalow side. Before conversion

Fig 8. Bungalow hallway. Before conversion

Fig 9. Bungalow hallway. Before conversion

Fig 10. Bungalow living room. Before conversion
Final Loft Conversion Drawings
Below are some of the drawings supplied by the architect. Please note that we have extracted certain drawings for you to see. The new roof design consists of a gable end being built each side of the bungalow. Then the roof slopes down from each side of the gables into a valley. There are four valleys in total, their purpose is to direct the flow of water to the guttering.
Although a double dormer loft conversion would have provided more space, the customer favoured a hip to gable design. This is because a bungalow hip to gable conversion looks more natural, instead of bulky dormers sticking out.

Fig 11. Bungalow hip to gable loft conversion plan

Fig 12. Bungalow hip to gable loft conversion plan. Downstairs
(Image taken from Architect Drawings)

Fig 13. Bungalow hip to gable loft conversion plan. Upstairs
(Image taken from Architect Drawings)
ERECTING SCAFFOLDING

Fig 14. Bungalow loft conversion in Basildon scaffolding. Front

Fig 15. Bungalow loft conversion in Basildon scaffolding. Rear
CHECKING EXISTING FOUNDATIONS

Fig 16. Checking of existing foundation. Front of house

Fig 17. Checking of existing foundation. Front of house

Fig 18. Checking of existing foundation. Front of house

Fig 19. Checking of existing foundation. Front of house
REMOVAL OF EXISTING ROOF

Fig 20. Removing tiles and felt from bungalow roof

Fig 21. Removing bungalow roof timbers and insulation

Fig 22. Old loft insulation being stored outside under yellow plastic sheet
REMOVAL OF DOWNSTAIRS WALLS

Fig 23. Removal of wall, that was between living room and bedroom

Fig 24. Before removal of wall, between hallway and bedroom

Fig 25. Removal of wall, between hallway and bedroom

Fig 26. Removal of wall, between hallway and bedroom

Fig 27. Temporary ceiling supports in living room and hallway

Fig 28. Removal of chimney breast in front bedroom

Fig 29. Removal of chimney breast in front bedroom

Fig 30. Removal of bathroom and tiles

Fig 31. Removal of bathroom cupboard
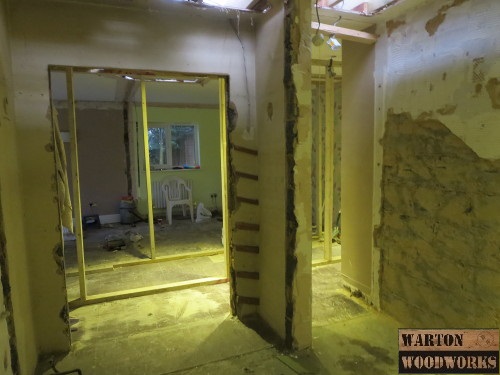
Fig 32. Removal of hallway coat cupboard and wall
INSTALLING CONCRETE PADS

Fig 33. Installation of concrete pad in dining room. External wall
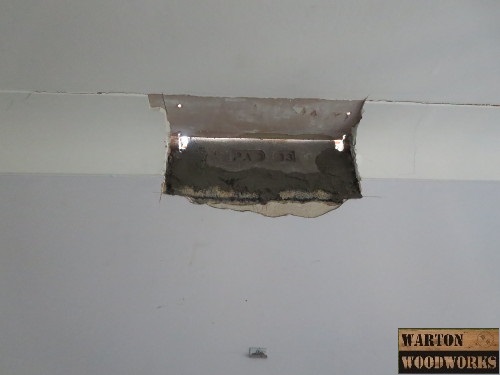
Fig 34. Installation of concrete pad in dining room. External wall
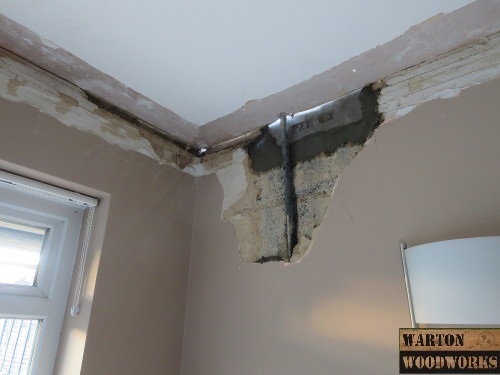
Fig 35. Installation of concrete pad in living room. External wall

Fig 36. Installation of concrete pad in kitchen. External wall

Fig 37. Installation of concrete pad in kitchen. External wall

Fig 38. Installation of concrete pad on external wall. Top view

Fig 39. Installation of concrete pad. Internal wall
INSTALLING NEW JOISTS

Fig 40. Delivery of wooden joists

Fig 41. Installation of new stronger wooden joists, alongside older ones

Fig 42. Installation of new stronger wooden joists, alongside older ones
INSTALLING CEILING STEEL

Fig 43. Installation of steel between internal walls
NEW DOWNSTAIRS WALLS

Fig 44. Cleaning old bathroom area, ready for new plasterboard walls

Fig 45. Installation of new plasterboard wall, for utility room

Fig 46. Preparing to installation new plasterboard wall, for WC
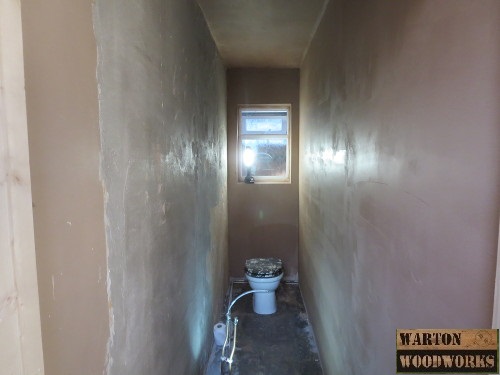
Fig 47. Installation of new plasterboard wall, for WC
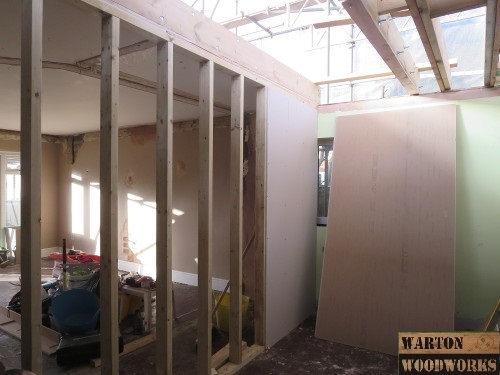
Fig 48. Installation of new plasterboard wall, between living room and stairs

Fig 50. Utility room from the inside

Fig 51. Utility room from the inside. New plasterboard wall on the left

Fig 52. New plasterboard wall installed where old chimney breast was
ELECTRICS DOWNSTAIRS

Fig 53. Installation of new electrical socket for TV/Audio. Used to be opposite side

Fig 54. Installation of new electrical socket for TV/Audio. Used to be opposite side

Fig 55. Wall where electrical socket for TV/Audio used to be

Fig 56. Relocation of electrical meter and fuse box into utility room. Used to be in hallway coat cupboard
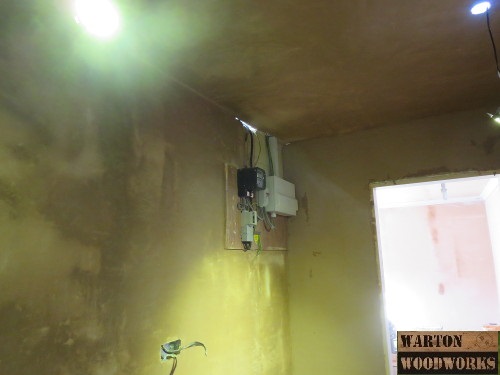
Fig 57. Relocation of electrical meter and fuse box into utility room.
PLASTERING DOWNSTAIRS

Fig 58. Plastering of old bedroom, front of house
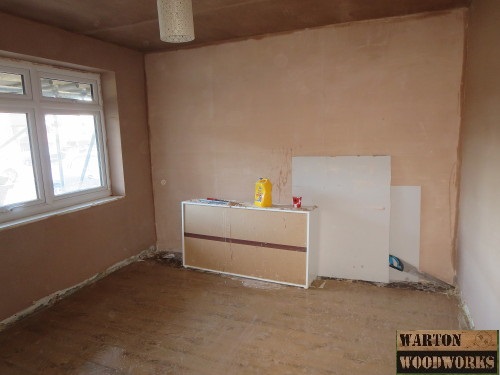
Fig 59. Plastering of old bedroom, front of house

Fig 60. Plastering of modified living room wall

Fig 61. Living room wall. Before removal of TV sockets

Fig 62. Plastering of living room wall, where TV/Audio sockets used to be
STAIR INSTALLATION

Fig 63. Installation of staircase
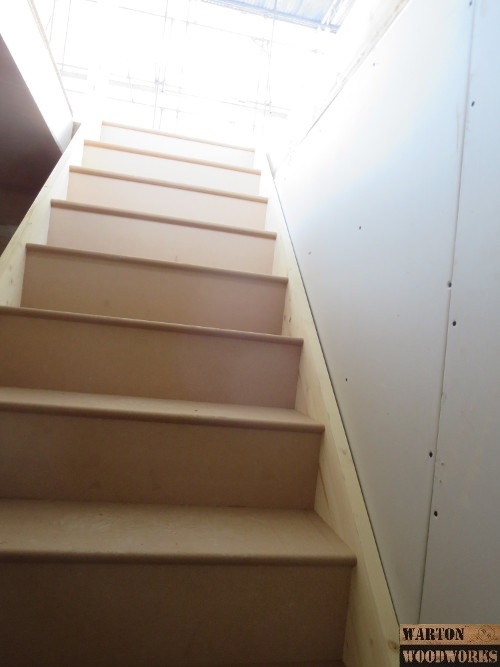
Fig 64. Installation of staircase
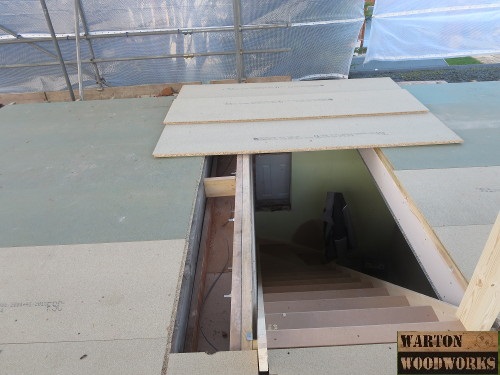
Fig 65. Installation of staircase. Top view
INSTALLATION OF ROOF STEEL

Fig 66. Delivery of roof steels

Fig 67. Delivery of roof steels

Fig 68. Installation of roof steels

Fig 69. Installation of roof steels

Fig 70. Installation of roof steels

Fig 71. Installation of roof steels

Fig 72. Installation of roof timber
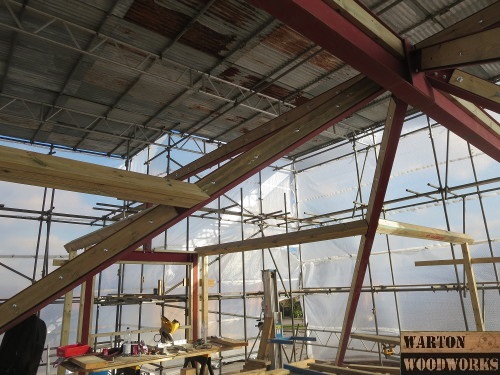
Fig 73. Installation of roof timber

Fig 74. Installation of roof timber
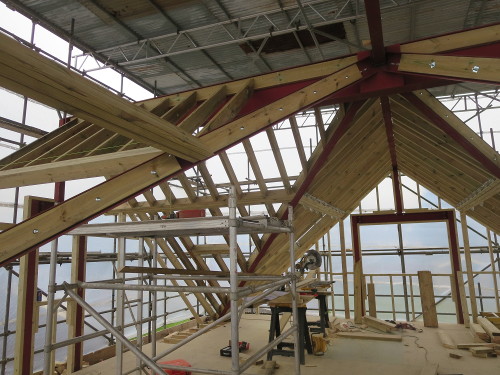
Fig 75. Installation of roof timbers

Fig 76. Installation of roof timbers

Fig 77. Installation of roof timbers

Fig 78. Installation of roof timbers

Fig 79. Installation of roof timbers

Fig 80. Installation of roof timbers
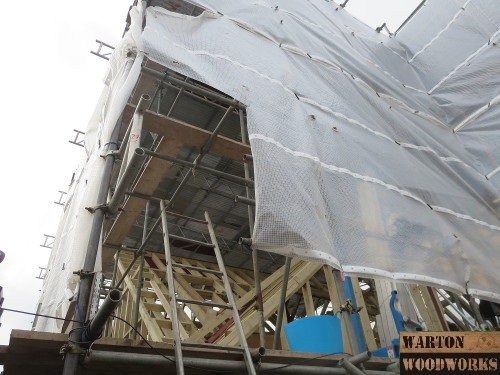
Fig 81. Installation of roof timbers

Fig 82. Video. Walking the ridge!
Bungalow Hip to Gable Loft Conversion Roof
INSTALLING INTERNAL WALLS UPSTAIRS

Fig 83. Building internal walls within loft space

Fig 84. Building ceiling within loft space

Fig 85. Building internal walls within loft space

Fig 86. Building internal walls within loft space
ROOF FELT AND GABLE BOARDING

Fig 87. Felting the roof

Fig 88. Felting the roof, and fitting plywood to the outside

Fig 89. Fitting plywood to the outside
ROOF TILES

Fig 90. Installation of composite roof tiles

Fig 91. Installation of composite roof tiles, and Velux windows

Fig 92. Installation of composite roof tiles
PLUMBING UPSTAIRS

Fig 93. Plumbing within the new loft space
INSULATION
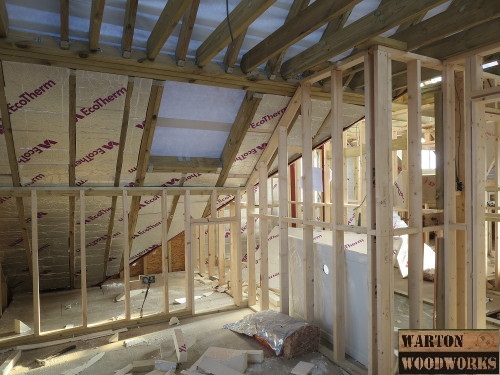
Fig 94. Insulating bedroom 4 (See Fig 13 for plan)

Fig 95. Insulating bedroom 2 (See Fig 13 for plan)

Fig 96. Insulating the roof
INTERNAL WALLS UPSTAIRS

Fig 97. Bedroom 4 (see Fig 13 for plan). After insulation and plaster boarding.

Fig 98. Bedroom 4 walk in closet (see Fig 13 for plan). After insulation and plaster boarding.

Fig 99. Main bathroom (see Fig 13 for plan). After insulation and plaster boarding.

Fig 100. Bedroom 4 (see Fig 13 for plan). After insulation and plaster boarding.

Fig 101. Bedroom 4 (see Fig 13 for plan). After insulation and plaster boarding.
View of En suite and Walk in closet

Fig 102. Bedroom 2 (see Fig 13 for plan). After insulation and plaster boarding.

Fig 103. Bedroom 4 (see Fig 13 for plan). After insulation and plaster boarding.

Fig 104. Bedroom 4 (see Fig 13 for plan). After insulation, plaster boarding and plaster finish.
DECORATING

Fig 105. Living room. Decorated (see Fig 13 for plan).

DO YOU LIKE THE FEATURE WALL?
IF SO, FIND OUT HOW TO DO IT, AND WHERE TO BUY IT

Fig 106. Living room. Decorated (see Fig 13 for plan).

Fig 107. Decorated stairs (see Fig 13 for plan)

Fig 108. Bedroom 2. Decorated (see Fig 13 for plan)

Fig 109. Bedroom 2. Decorated (see Fig 13 for plan)

Fig 110. Main bathroom. Decorated (see Fig 13 for plan)

Fig 111. Main bathroom. Decorated (see Fig 13 for plan)

Fig 112. Bedroom 3. Decorated (see Fig 13 for plan)

Fig 113. Bedroom 3. Decorated (see Fig 13 for plan)
RENDER & OUTSIDE FINISH

Fig 114. Completed Bungalow Hip to Gable Loft Conversion in Basildon
Enjoy this Loft Conversion in Basildon Post? If so, please follow our Facebook Page. Or Contact us for a quote if you live in Essex, UK


